Analysis
The "Analysis" frame displays the analysis results. Several analyses can be performed for a single task.
The starting point in the slope stability analysis is the selection of the type of slip surface. The input is available from the combo list in the left top part of the frame containing two options - circular slip surface and polygonal slip surface. After introducing the slip surface, the analysis is started using the "Analyze" button. The analysis results appear in the right part of the frame.
The type of analysis is selected in the midsection of the frame - seven methods are available for the circular slip surface (Fellenius/Petterson, Bishop, Spencer, Janbu, Morgenstern-Price, Shahunyants or ITFM), and six methods are available for the polygonal slip surface (Sarma, Spencer, Janbu, Morgenstern-Price, Shahunyants, or ITFM). For both cases of the assumed slip surfaces it is possible to perform the analysis employing all methods at once (in such a case, however, the slip surface cannot be optimized).
The actual verification of slope stability can be performed, depending on the settings in the "Stability analysis" tab:
- Verification according to EN 1997, where the load is reduced by the partial factors and the verification is performed according to the theory of limit states.
- Verification according to the factor of safety
- Verification according to the theory of limit states
- Verification according to DIN1054
- Verification according to SIA 267
In the combo list the analysis type is selected:
- Standard
- Optimization (for circular or polygonal slip surface)
- Grid search (only for circular slip surface)
Choosing the "Optimization" option activates the "Restrictions" button - pressing this button changes the frame appearance and makes it possible to introduce restrictions on the optimization procedure.
If the "enter shear parameters of soil on the slip surface" option is selected in the "Settings" frame, the "Parameters" button will be displayed.
It is also possible to specify how to deal with anchors in the analysis ("Assume anchors as infinite" box).
The slip surface, even the optimized one, must be introduced in the frame.
The analysis results appear in the left part of the frame and the optimized slip surface on the desktop. Visualization of results can be adjusted in the frame "Drawing Setting
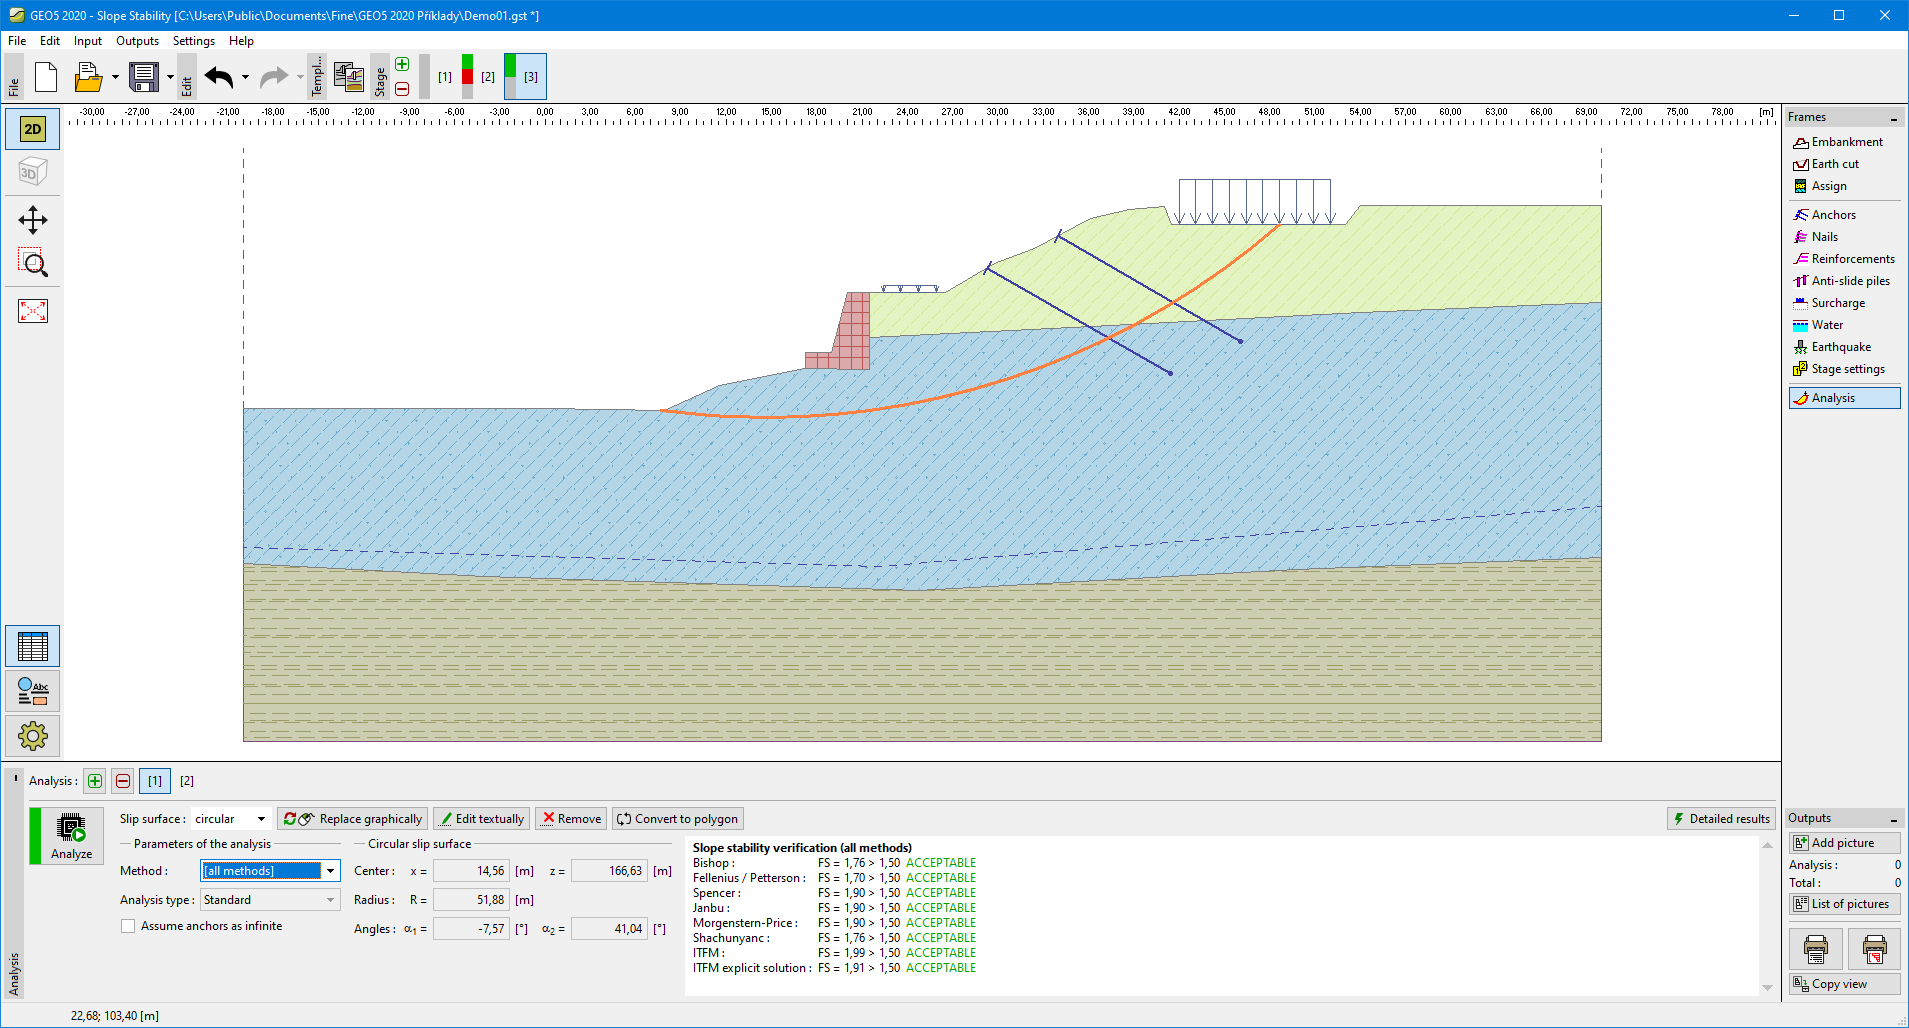 "Analysis" frame - circular slip surface
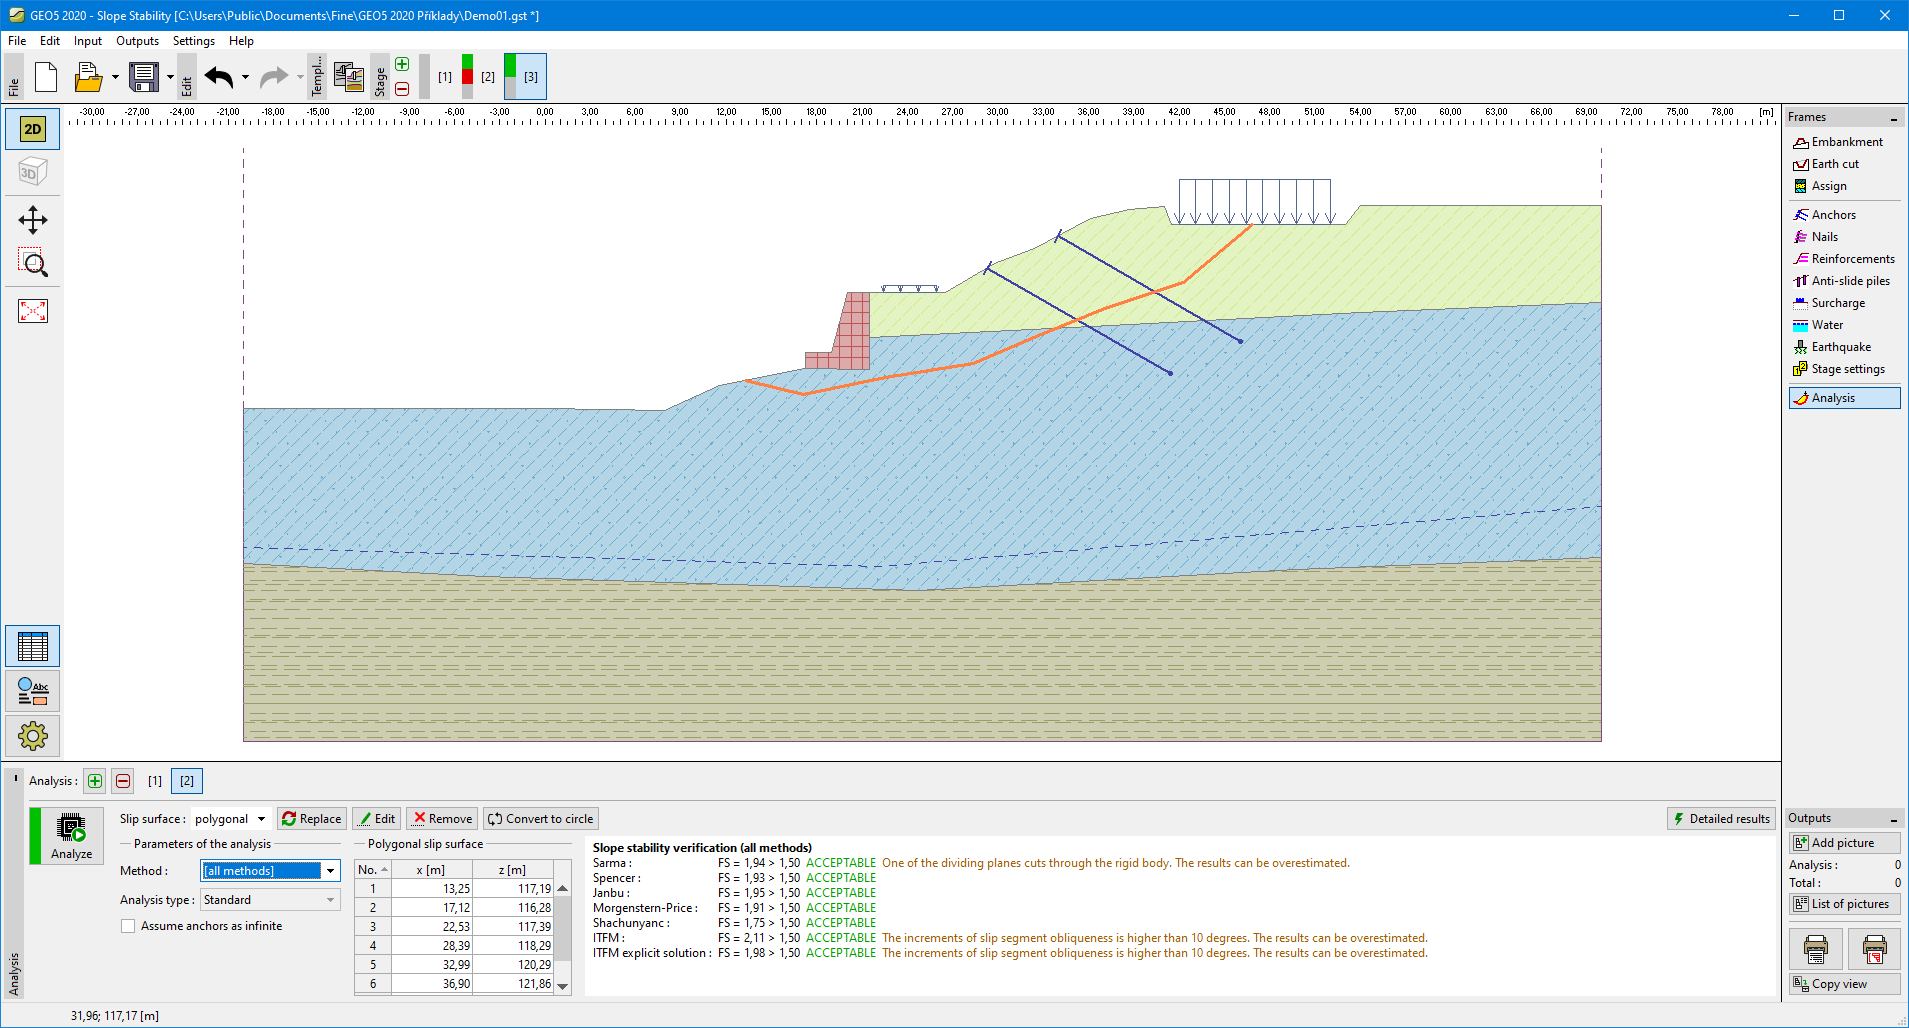 "Analysis" frame - polygonal slip surface